Saturday, September 17, 2016

orange peel pincushion tutorial

It's been a while since I put out a free pattern or tutorial, and I know how you all just love freebies...so here is a goody for you. This idea came to me last Friday when I was walking home from dropping my daughter off at school. I love orange peels and cathedral windows, and this is a combination of those. I made (4) one-inch scrappy (foundation paper pieced) diagonal blocks, basted two pieces of same-sized squares folded on top and sewed all four blocks together. I threw on a couple of borders, sewed some lovely Robert Kaufman Essex Yarn Dyed Linen in black on the backside, filled with cornmeal, finished off with a ladder stitch and there you go. BOOM!


If you didn't quite understand all of that, we'll go through this step-by-step. I love pictures and hope there are enough for you to understand where this is going.
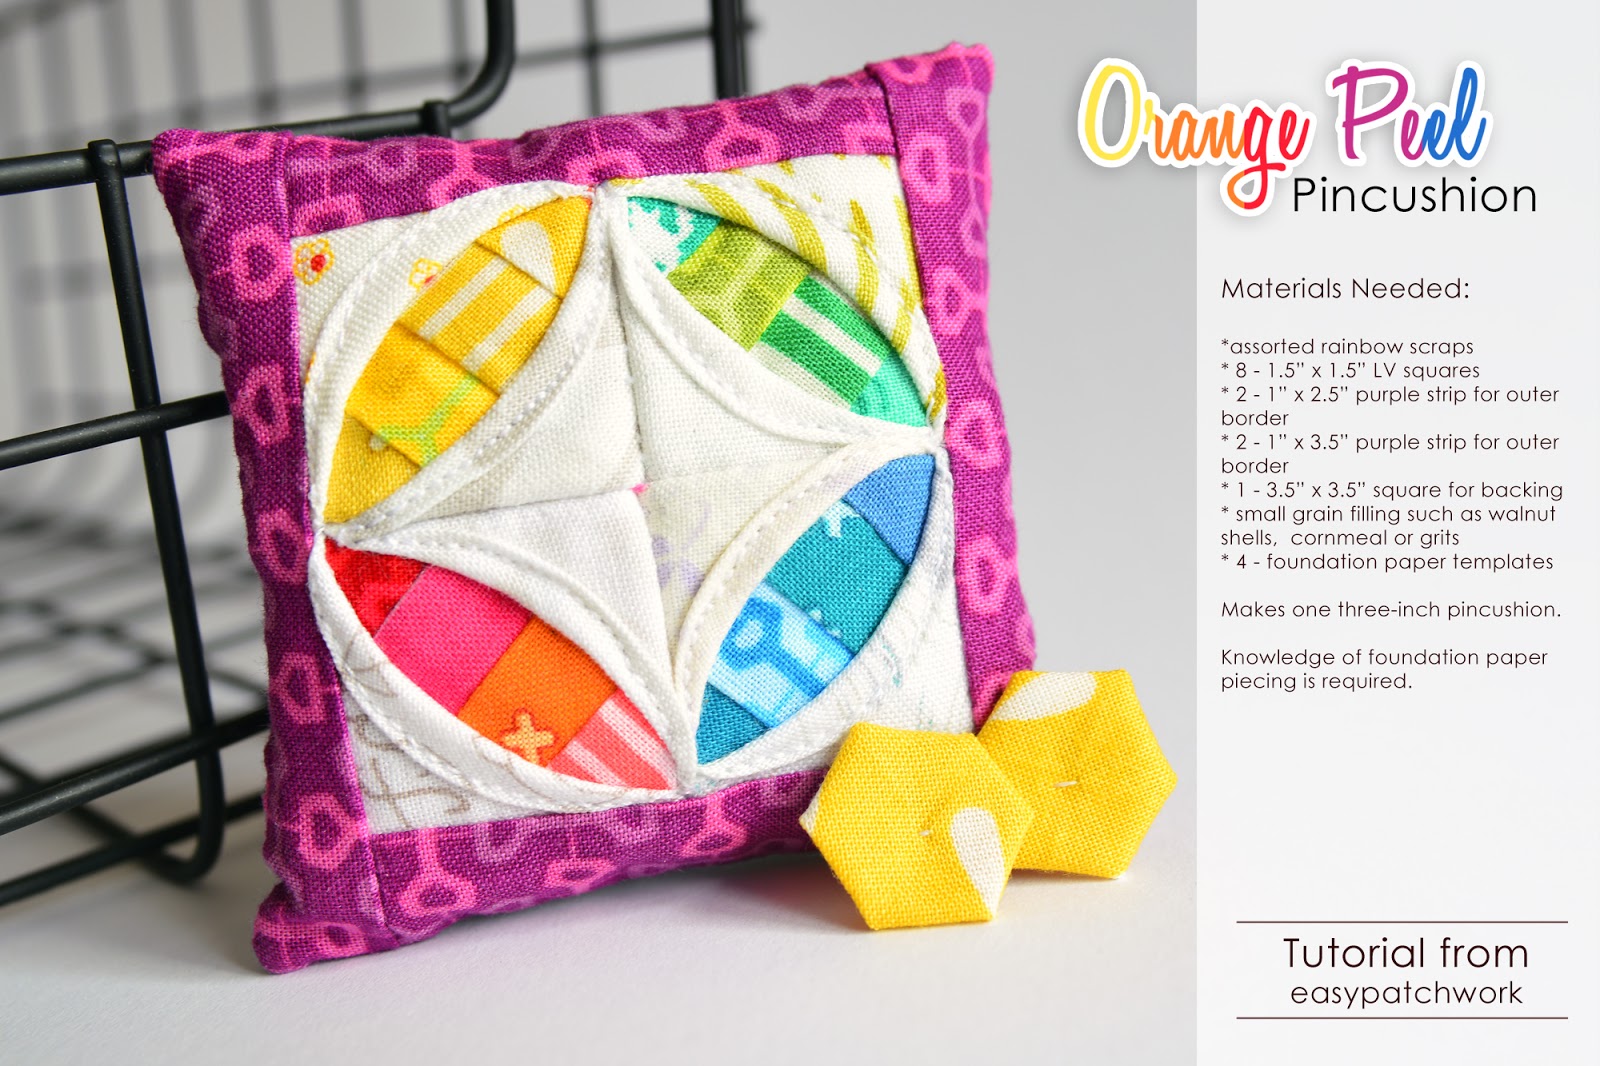
Materials Needed:

Various rainbow scraps for diagonal blocks
(8) 1 1/2" x 1 1/2" Low Volume fabric squares for windows
(2) 1" x 2 1/2" purple fabric strip for border
(2) 1" x 3 1/2" purple fabric strip for border
(1) 3 1/2" x 3 1/2" backing fabric
about ½ cup or 100 grams of small grain or filling 
such as crushed walnut shells, cornmeal or grits
(4) 1-inch diagonal strip block templates for foundation paper piecing. You can make your own or download the complete pattern found on Etsy.
Hand sewing needle & thread 

  • Makes one, three-inch pincushion. 
  • Knowledge of foundation paper piecing is required. 
  • Knowledge of how to make a pincushion can be helpful as well as a ladder stitch
  • Please use a scant 1/4 inch seam allowance when sewing. 
  • Reduce your stitch length to 2.0 or 1.5 to allow for easier paper removal and better endurance.


Let's get started....

Cut out four templates from the one-inch diagonal strip blocks template sheet free for download.


Make four blocks in four different colorways using the fpp templates. I chose yellow, red/orange, greens and blues. Make sure you overlap the seam allowance on the foundation paper with ample fabric. You can always cut off the extra.


Trim up your one-inch blocks using the seam allowance guide on the back, a good ruler and rotary cutter. (My, oh my, how those blocks look so much cuter when they are squared up.) Take your papers out now. (I left mine in.)


Take all eight (8) 1 1/2" x 1 1/2" squares and fold them in half diagonally. Press with a warm iron. 


Place one folded square (now a triangle) over each foundation pieced block as shown below.


Place the second triangle over the block and baste using a 1/8th seam allowance. Please be very accurate in this step. If you are not, the windows might not line up on all four blocks. (The blue and green diagonal strip blocks are swapped in this foto. I just wanted to see if you were paying attention.)


Once all four blocks are basted, connect two blocks. Press seam open or to one side. Sew the other two blocks together and then connect to make a four patch. Attach borders.


Open your windows and pin in place. Now doesn't that look pretty!!?? 

NOTE: You could put a little piece of fabric in the middle to make a Cathedral window.


Still using a stitch length of 2.0 to 1.5, top stitch the windows in place.


Layer your backing fabric and pincushion top right sides together (RST). Sew around the outside leaving a two inch gap along one side to flip. Trim corner at a 45° angle to get a sharp corner. Flip. Thread a hand needle with a color matching your backing fabric. 

Sorry - NO FOTO for this step! I was sewing instead. : )


Start to sew the seam shut. Using a small funnel, fill your pincushion up with the small grain filling. I used (organic) cornmeal, because if flows through my funnel easily and has the right grain size.  Continue to sew the seam shut and filling with more grain. All finished.


You also can make a classic orange peel like this:


Or you can make all kinds of other variations such as only using one triangle per block.


Or flip the block around to make a pinwheel.


I would love to see what you can come up with. Please post your photos on Instagram so we all can see. Use the hashtag #eporangepeelpincushion. Or drop me an email. 

If anything is unclear, please feel free to drop me a note, and I will try to make it clearer for all.  


Thanks for dropping by! Happy sewing! Feel free to look around. I have a lot of other tutorials and freebies here on my blog.

Thursday, September 8, 2016

sedona star quilt

Hello my dear quilty friends! I would like to share my newest pattern with you, the Sedona Star Quilt for Quilts from Quiltmaker's 100 Blocks on stands now! 


Just pop on over to Quilty Pleasures Blog to see this exciting pattern for a throw quilt. If you live abroad and can't find the magazine, you can download the PDF directly from their website. Oh, and did I mention, I am also a guest blogger on their site today?! You can learn all about me and how I fussy cut most of the blocks in this quilt. (Psst. I spy the gecco, do you too?)
Sedona Star Quilt -  Designed and Sewn by Karen Ackva, Quilted by Sabine Feldmann

Thanks for stopping by! Please feel free to leave a comment or some criticism. I love reading what you have to say. : ) You make my day!

-Karen

Sunday, September 4, 2016

Rainbow Peel-iscious

And that is a wrap for this gorgeous pillow... I decided to go with a little rainbow piping. From each of the Lecien L's Modern Basic charms used in the pillow plus a couple others to fill in the gaps, I cut a 1 5/8 inch strip and connected them on the straight grain. Normally you would use a biased piping, but I had to work with what I had. Otherwise, I wouldn't have had much fabric to work with if both sides were cut off diagonally. That purple corner was a little tricky, because I actually started sewing after that corner instead of before the corner, but I managed to get it together.


Working with Robert Kaufman's Yarn Dyed Essex Linen is a dream. I first used it when I designed and made the "Countdown to Christmas" Advent Calender last year for the Fat Quarterly. I am not sure this E-Zine publication is still available due to a conflict of interest of international trading zones.


I do have one word of advice about it though. Do not iron it too much or at a high temperature. IT WILL SHRINK!

As far as the back of the pillowcase, I wanted to make a hidden zipper but thought about an interesting element of having the zipper stand out. I used a little red fabric leftover from the front of the pillow for a zipper end on both sides. I used the fake Sashiko stitching from the from and top stitched the zipper on both sides. It doesn't look as good as the front and I had to figure out why. I used a very thin polyester bobbin thread when appliqueing the orange peels on the front. When top stitching the back, I used 100% cotton for both the top and bottom threads. This diminishes the effect.


Because we have had such nice summer weather this year, I wanted to get out and take some pretty location photos. These are my favorites.

Sitting in a Windowsill
Hiding in the Pumpkin Patch
This pillow was really fun to make. I brushed up on my applique skills again which I need to do every now and again. I like the radiation of color from the center outwards too. I will not be keeping this one, although I really want to make a pillow for me or for my family. (I have an idea.) This is a very special "angel" pillow for someone who did not receive one in the summer round of Pillow Swap Four Seasons. I regret to say, it seems that every round something happens to one of the pillows or one of  the participants. I really hope the new "owner" will like it. : )

Thank you for dropping by!